In today’s digital age, managing your home or office network efficiently is crucial. One of the essential tasks for any network administrator is accessing the router’s admin panel. For many routers, this can be done through a specific IP address, such as 192.168.188.1. This blog will guide you through the steps to access your router’s admin panel using this IP address, offering tips and troubleshooting advice along the way.
What is 192.168.188.1?
192.168.188.1 is a private IP address commonly used by certain routers as their default gateway. It allows users to access the router’s administrative interface, where you can configure settings, update firmware, and manage network security.
How to Access Your Router’s Admin Panel
Step 1: Connect to the Network
Ensure that your computer or mobile device is connected to the router, either via Wi-Fi or an Ethernet cable.
Step 2: Open a Web Browser
Launch your preferred web browser (e.g., Chrome, Firefox, Safari).
Step 3: Enter the IP Address
Type http://192.168.188.1 into the browser’s address bar and press Enter.
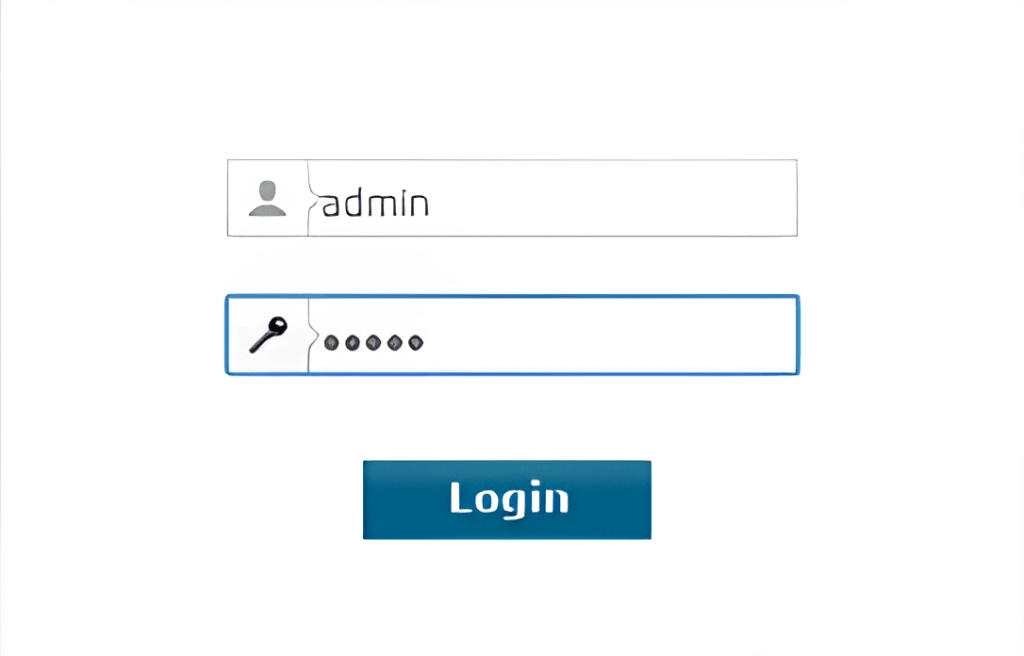
Step 4: Login
You will be prompted to enter a username and password. If you haven’t changed these from the default settings, you can usually find the default credentials in the router’s manual or on a sticker on the router itself. Common defaults are:
- Username: admin
- Password: admin or password
Step 5: Access the Admin Panel
After entering the correct login information, you should be taken to the router’s admin interface. Here, you can manage various settings such as:
- Network Settings: Configure your SSID, Wi-Fi password, and other network details.
- Security Settings: Set up firewalls, parental controls, and other security features.
- Firmware Updates: Keep your router’s software up to date for the best performance and security.
- Device Management: View connected devices and manage bandwidth allocation.
Troubleshooting Tips
If you encounter issues accessing the admin panel, here are some common solutions:
Ensure Correct IP Address
Make sure you are using the correct IP address. If 192.168.188.1 doesn’t work, check your router’s documentation or use the command prompt to find the default gateway:
- On Windows, open Command Prompt and type ip config, then look for the Default Gateway under your network connection.
- On Mac, open Terminal and type netstat -nr | grep default.
Check Connection
Ensure your device is connected to the router’s network. If you’re using Wi-Fi, try moving closer to the router or using a wired connection.
Reset the Router
If you’ve forgotten your login credentials or suspect they have been changed, you may need to reset the router to its factory settings. This typically involves pressing and holding a reset button on the router for about 10 seconds. Note that this will erase all custom settings.
Conclusion
Accessing your router’s admin panel via 192.168.188.1 is a straightforward process that allows you to manage and optimize your network. Whether you’re changing your Wi-Fi password, updating firmware, or configuring security settings, the admin interface is your control center. By following the steps outlined in this guide, you’ll be able to take full advantage of your router’s capabilities and ensure your network runs smoothly and securely.
For more tech tips and network management advice, stay tuned to our blog.


Leave a comment